
Designed for young people, aged 6 to 10.
This series of classes is designed for the youngest chefs who are interested in entering the world of cooking food. This is a five-session series with each lasting 1 1/2 hours. The classes must be taken in order, but do not need to be week to week. Your young chef can experience session 1 this summer, session 2 the next time the series is offered, etc.
Easter
Regardless of how you celebrate Easter, you’re likely aware of some traditions surrounding the use of eggs. Common American practices include hiding eggs, coloring eggs, and eating delicious chocolate eggs! But did you know that eggs feature in other ways for Easter traditions in different cultures? Here are a few of my favorites:
Giant Omelets
In southern France, there is a giant omelet festival put on by the Knights of the Giant Omelet. Unbelievably, using over 15,000 eggs, cooks create a gigantic omelet to serve to the folks who participate in the festival free of charge (feeding around 1,000 people)! And if you want a taste of France that’s not a gigantic omelette, consider making hollandaise to jazz your eggs up (see recipe below)!
A Whimsical Way to go Egging
In Mexico, cascarones are

Cascarones
used as a form of celebration. These treats are hollowed-out eggs that have been decorated on the outside, filled with confetti, then closed up with tissue paper over the opening. Cascarones can be used as colorful centerpieces or to add playful whimsy to your meal, as it’s great fun to break these eggs over your peers or children’s heads and shower them in the brightly colored confetti. While traditionally, these eggs are more likely to appear during Mardi Gras, they’ve been a big hit at Easter celebrations and egg hunts in more modern times.
Decorate Eggs with Beeswax

Pysanky
A Ukrainian egg tradition takes the form of decorating eggs using dyes and beeswax. Called pysanky, these eggs become beautiful art pieces for your table. While it can take more time to accomplish, it’s a more upscale way of having decorated eggs at your table than the more standard version of dipping eggs in vinegar + dye.
The world is a beautiful place filled with wonderful food traditions, and here at Art of Cookery, we appreciate such creative ways to celebrate! Check out our current classes if you want to improve your cooking skills for a special Easter meal. And if you’d like us to handle the cooking for you, we’ve got you covered!

Quick and Easy Hollandaise
Here's a quick no-fuss way to make hollandaise sauce that doesn't split on you.
Equipment
- 1 blender
Ingredients
- 3 egg yolks Be sure they are pasteurized and properly refrigerated as this recipe isn't cooking the eggs.
- 1 tbsp lemon juice
- 1/4 tsp fresh thyme optional
- 1/16 tsp cayenne pepper
- 1/16 tsp salt
- 1/32 tsp white pepper black is fine too
- 1/2 c unsalted butter melted
Instructions
- Place yolks, lemon juice, cayenne, thyme (if using), salt, and pepper in blender.
- Run blender until fully mixed.
- While blender is running, open pour spout and slowly pour the melted butter in.
- Blend until fully emulsified.
- taste and adjust lemon juice, salt and pepper to your liking. SERVE!
Notes
Alternatively, use a double boiler with gently simmering water and whisk the eggs and lemon juice together over it. When mixture is doubled in volume, whisk in the butter until thickened. Remove from heat and add thyme, salt & pepper.
Youngest Chef Series Session 2 Ages 6-10
Kids: Youngest Chef Cooking Series
Designed for the youngest chefs, aged 6 to 10.
This series of classes is designed for the youngest chefs who are interested in entering the world of cooking food. This is a five-session series with each lasting 1 1/2 hours.
Session 2: Introduction to Measuring and Burners:
This session lightly engages in foundation skills for cooking (measuring, cracking eggs, stirring, stove safety). Foods made in this session are mini pancakes and breakfast meat with fried or scrambled eggs if there is time.
Youngest Chef Series Session 1 Ages 6-10
Kids: Youngest Chef Cooking Series
Designed for young people, aged 6 to 10.
This series of classes is designed for the youngest chefs who are interested in entering the world of cooking food. This is a five-session series with each lasting 1 1/2 hours.
Session I: Knife Skills and Food and Kitchen Safety:
To provide a sound foundation for future lessons, students will learn basic kitchen conduct, spreading food on bread, peeling food, terminology, and knife skills (using plastic knives). Foods made in this session will be sandwiches and apple slices.
Cooking Classes – Not a Lot of Thyme
Not a Lot of Thyme
Hello friend! It has been a while since I reached out with a blog post. 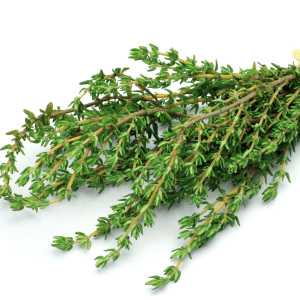 This one will be fairly short and here’s why: Art of Cookery is busier than it has ever been since opening in 2009. Cooking classes are occurring more often and are bigger than ever. People are coming from further away than ever too.
WOW that is humbling
It is also winter, and I miss my fresh herb garden. Thus, the title (Not a lot of thyme). See what I did there? 🙂
Upcoming Classes
Many upcoming classes are booked out, but here are some with space still available:
- Convection Cooking – 1/24/23 @5:15 pm – $20
- Jam Session – 1/26/23 @12noon – $30
- Make a Gourmet Pasta Meal – 2/2/23 @ 11am – $55
- Handmade Ravioli – 2/7/23 @5:00 pm – $35
- Pierogi Paradise – 2/15/23 @5:00 pm – $30
Click on the class title to read more about it and book online.
We are shut down for our yearly re-set and R&R between mid-Feb through mid-March.
Retail Food Menu
We’ve been doing retail food orders for a bit over 1 year now. Below is the menu for 1/16 – 1/31. Feel free to order now for pick-up during that time frame. Ordering early helps me schedule things. As we start the new year, I’ve made a few diets conscious menu choices. Keto seems to be the big thing.
Feel free to contact me privately and ask for a food/diet meal that is not on the menu, but know it isn’t likely to occur for pick-up the same day, but you never know. I am some people’s apparent private chef who take advantage of this.

Did you Know?
- We take private cooking classes and they don’t need to be on my class listings. For example, your group wants to learn about cooking with herbs; or, how to use a Tagine.
- We do Murder Mystery dinners, called Delicious Demise, by private request. Minimum of 6 people.
- We do about 4-5 small catering events each year. Inquire if you are curious about your event.
- You can order off our menu for a hot and ready to eat meal, we just need a heads-up.
- We do Bachelorette/Bridal Party events.
Class Suggestions?
We are always open to suggestions for class topics. Just reach out via email at ICan@artcookery.com.
Winter Wanderland
I know I said this would be short. Here’s the last item… Winter Wanderland 2023 is coming up. John and I are founding members and very involved in this weekend event. Click HERE for the events/times/locations occuring for the 2/3 through 2/5 weekend event.


National Lasagna Day!
Lasagna!
July 29, 2022 is National Lasagna Day. It repeats on this day every year. So, I am compelled delighted to give up my free time compose this post for you. I’m just going to have a glass or three of wine while writing fun with this post. It is all real information, but I thought I would do something annoying entertaining for you via strikeouts.
While mining the internet desperately researching this blog, I was quite surprised to discover the history of lasagna. Allow me to bore inform you regarding this delicious dish known around the world.
Fun Facts:
- The word comes from the Latin word lasanum, which means chamber pot.
I am not sh1tting you!I’m guessing it transitioned to the food meaning due to using newhopefully cleanchamber pots to cook the pasta dish. It makes sense to me. - The plural for lasagna is lasagne.
Who knew? - The earliest known lasagna recorded was in the 13th century and would not have contained
love applestomatoes as they were thought to be poisonous due to their close relationship to the deadly nightshade plant. - How does one wish another a happy lasagna day? Like this:
Here’s some lasagna, enjoy.We send you lots of love on the delightful celebration of National Lasagna Day…. may each and every day of the coming year be blessed with delicious comfort foods like lasagna….. Have a tasteful day!!!
There are zillions of lasagna recipes out there and some are pretty crappy sounding more than 100 different versions of lasagne. Most contain tomatoes, noodles, and ricotta; but, some are based on béchamel sauces and contain lots of different veggies, like eggplant or zucchini instead of noodles. The meat may or may not be present but ranges from ground beef, pork, poultry, lamb to bacon and chopped steaks. Mushrooms are the most common replacement for meat.
Moving on
There’s a lot more to share but you have already jumped to the recipe and won’t see this but I will move on in this post. I have included my recipe for lasagna at the bottom of this post.
To celebrate this odd yet fun under-appreciated holiday, Art of Cookery is making up a couple of batches of lasagna for our retail branch, Cookery Creations. They will be available for free sale while supplies last in 16-ounce and 8-ounce portions. Watch our facebook page for the announcement that there is some in the Magic front fridge.
Never heard of our Cookery Creations?
You probably know Art of Cookery is a world-renowned cooking school (I wish!). But do you know that we also have a retail food license and sell meals? You can order for a specific item or items on our menu and name a convenient pick-up day/time. Or you can take a chance on what is in the Grab n Go Fridge inside the front door. You can even order and pay online. Just come on in and snag a meal or two. They are very convenient for not wanting to cook evenings, it’s too hot to cook and for work lunches. Not to mention, its yummy and nearly free reasonably priced and you get a lot in a 16-ounce bowl. Check out our menu here.
Poll (Just cuz I’m curious):
The recipe (You skipped the blog and just jumped to it didn’t you?):

Chef Valerie's Lasagna
A meaty lasagna that hits the marks of a great comfort food and a beautiful Italian dish.
Servings: 16 servings
Cost: $26.50
Equipment
- 1 13x9 or deeper greased lasagna pan Deeper is better.
- 1 Sheet aluminum foil for covering greased to prevent cheese stickage
- 1 Large Saucepan
- 2 Stirring and Scraping utensils Wooden spoon and rubber scraper
- 2 Small bowls
Ingredients
Noodle Layer
- 1 16 oz box of Lasagna noodles In reality, I make the noodles myself but offering you a shortcut here.
Meaty Tomato layer
- 3/4 lb sweet Italian sausage
- 1/2 lb lean ground beef
- 1.5 c diced onion
- 1/2 c finely diced celery
- 1/2 t red pepper flakes
- 1/8 t salt just a pinch
- 6 cloves garlic minced
- 1 t Italian seasoning
- 2 t fennel seed
- 6 oz tomato paste
- 2 28 oz cans San Marzano tomatoes crushed after opening
- 2 c water can substitute some or all water for your favorite wine
- 2 T sugar
- 1.5 t fresh oregano
- 1 t salt
- 1/2 t freshly ground black pepper
- 2 T fresh basil
Cheese Layer
- 30 oz ricotta cheese, whole milk can substitute small curd cottage cheese
- 1.5 c shredded parmigiano reggiano cheese
- 1 lg egg
- 1/2 c minced fresh parsley
- 3/4 t salt
- 1/2 t garlic powder
- 1/2 t freshly cracked black pepper
Yet Another Cheese Layer
- 3 c shredded mozzarella cheese whole milk version
- 1/2 c shredded parmigiano reggiano cheese
Garnish
- plenty of vivid green herb like basil, green onion, and/or parsley
Instructions
- Cook the noodles per box instructions (or make your own).
Assemble Meat Layer
- In saucepan, cook meats, onion, celery, and pepper flakes with a pinch of salt.
- Add the garlic, Italian seasoning, fennel, and tomato paste when the meat is barely browned and cook for 3 more minutes.
- Add tomatoes, water/wine, sugar, oregano, salt, and pepper. Bring to a boil, reduce heat and simmer gently for at least 30 minutes.
- Right before assembling lasagna, add the basil.
Assemble Cheese Layer
- Preheat oven to 400 F.
- In small bowl mix together the two cheeses, egg, parsley, and black pepper.
Assemble Yet Another Cheese Layer
- In a small bowl blend the mozzarella and the parmigiano-reggiano cheeses.
Pulling it all together
- In the greased pan, spread 1 c of the meat sauce and then add a layer of the cooked noodles.
- Layer 1/3 of the cheese egg parsley mixture over noodles.
- Spread 1 1/4 c of the meaty sauce over the cheese mixture.
- Add another layer of noodles, followed by one half of the remaining cheese mixture.
- Spread 1 1/2 c of the meaty sauce over the cheese mixture.
- Add another layer of noodles, followed by the remaining cheese mixture.
- Spread 2 c of the meaty sauce.
- OPTIONAL: If your pan is tall enough and you have extra, add another layer of noodles and meaty sauce.
- Top with the bowl of mozzarella and parm cheese blend.
- Cover with greased foil, greased side down.
- Bake for 45 minutes. Uncover and bake 15 more minutes. When fully cooked the center should reach 160 degrees F.
- Remove from oven and let rest for 15 to 30 minutes. 30 is best.
- Garnish and serve!
Notes
Quality ingredients make a difference. Buy the best if you can.
The lasagna can be refrigerated for a day, or, wrapped and frozen prior to baking. To bake, remove from fridge or freezer and uncover 60 minutes prior to placing in oven. Recover and bake first for 55 minutes instead of 45.
July 29 of each year is National Lasagna Day. 🙂
A Spare Gus
It is finally THAT time of the year, ASPARAGUS is up!
As a child we had a lot of acres of it and had to pick it all ourselves. Sometimes we had to get up at 4 am to get some picked before school (and then consequently missed the bus and had to walk to school, uphill both ways, in the snow, barefoot) 🙂 But really, depending on which school it was 2 to 6 miles.
I hated asparagus as a child.
Now, I love everything about it. It is delicious, healthy, and beautiful. Also, it is fun to grow.
When we moved to our current location 3 years ago, I dug up some that I had planted at our previous place and a friend gave me some they were planting that spring on their farm. At age 3 the stalks are coming up fat and happy.
I thought I would include a little tutorial.
In case you didn’t know, when planting young asparagus roots, you don’t pick the little stalks that come up the next year. The second year you can take a couple of early pickings. The third year and after you can pick the whole season. My season cut-off date is June 20.
After June 20 I let the stalks (which are actually sprouts) grow into mature plants. A mature plant is about 6 feet tall and is graced with flowing ferning branches.
They enjoy a 10-10-10 or 15-15-15 for fertilizer. They prefer a light sandy soil and their roots grow large and deep. Fertilize when the soil starts warming, usually some time in April. I fertilize again when I stop picking.
If you want to plant a few crowns (roots) for yourself get on over to Tri-County Feeds in Montague as they are selling baby asparagus roots.
P.S. White asparagus is just green asparagus that never saw the sun or other nurturing light. Purple asparagus is a real line of plants. Its color comes from the high levels of anthocyanins in the spears.

Every June, go to Michigan’s Oceana County and enjoy the National Asparagus Festival. It is a fun, quirky festival. The mascot of the festival used to be (guess who?) Gus (as in A Spare Gus)
See bottom for an easy roasted asparagus recipe.
I’ve slightly changed our grab n go foods menu. Each menu will run for two weeks, rather than one. You can also order online through our shop. Of course, cash is welcome, as is venmo, zelle, paypal. There is a sign on the wall above the grab n go refrigerator describing the pay options. Ordering ahead is recommended to ensure you get what you want, but there are usually extras made and placed in front refrigerator for pick-up 24-7. However, there are no guarantees that everything on the menu will be present if you randomly stop in for something. There is always bread, mustard, and cookies. Jams are coming soon. Always check the menu dates at the bottom. Here is the current menu (and below that, the menu that starts May 30):


Roasted Asparagus
This quick and easy asparagus recipe is delicious, healthy, and beautiful as a side.
Servings: 2 people
Cost: 4.00
Equipment
- 1 baking sheet greased
Ingredients
- 1 lb asparagus get the fresh, thick stuff, the size of your thumb or more. If it came from more than 2 states away, skip it. You want fresh in-season stalks.
- 3 tbsp oil or fat I prefer bacon grease, followed by butter & then olive oil if I don't have bacon drippings.
- 1/4 t garlic powder
- 1 t salt
- 1/4 t black pepper or to taste. You can adjust after roasting.
- 2 tbsp parmesan cheese, small hole shredded if you must, use the pre-grated canister, but it is so much better shredded from a block of the real cheese.
- 2 eggs, poached super optional, yet super delicious. See notes for how to poach.
- 1/2 lemon, squeezed
- 1 pinch paprika optional, for garnish
Instructions
- Preheat oven to 425F
- Wash and trim the asparagus. To trim: break the cut/broken end by hand. It will naturally break where the tough butt ends.
- Whisk the oil/fat, salt, pepper, garlic powder together in a small bowl.
- Lay the washed, trimmed spears on the prepared baking sheet.
- Rub the whisked mixture onto the stalks.
- Bake at 425 for 10-15 minutes. The time will vary by the thickness of the asparagus. It should be easily cut but not mushy and slightly browned.
- Remove from oven and plate. Sprinkle cheese & lemon juice over.
- Optional: top with a 4-minute poached egg, cut in half at the moment of serving.
Notes
Poached Egg:
Heat 4 c water and 1 T white vinegar to simmering. You do not want a boil.
Meanwhile crack 2 eggs into 2 teacups or small vessels. Have a slotted spoon and a plate with paper toweling on it.
Once the water is simmering, set a timer for 4 minutes and gently pour each egg into the simmering water's surface.
After about 40 seconds, nudge each egg to be sure it didn't secure to the bottom or the pan.
When the timer rings, use the slotted spoon to remove the eggs. Place over asparagus. (for a much runnier yolk do a 3 minute egg)
ENJOY!
An even easier roasted asparagus recipe is to have a small loaf pan of melted salted butter, hotdog forks, and a bonfire. Light the fire, put the spears on the forks, dip in butter, and roast like marshmallows. Have a shaker of garlic salt for those who want to use it.
Derby Delicious
Derby Delicious Day!
Today is the running of the 2022 Kentucky Derby. YAY!!  My husband John and I are taking some foods and going to a local brewery with friends to enjoy it. Food is a very important part of the derby, per the Kentucky Derby Museum at Churchill Downs.
Early in 2021, my husband and I got stir crazy to escape our home as the pandemic continued. We didn’t feel safe flying at that point, and, we were traveling with our parrot, Bobbie. So….road trip.
We decided to do a loop to the east coast of the US and down to Savannah, then west to Atlanta and up through Kentucky and back to Michigan. One of my favorite stops was Churchill Downs. It was a bit surreal as was being used as a mass vaccination center with no races, but we did get to visit the museum there. It was fascinating!
I have always loved watching the triple crown races, especially the Kentucky Derby.
But I digress. In our Southern loop we enjoyed some foods not too common in our home state of Michigan. One in particular stood out, Pimento Cheese.
My take on it
When we got home, I researched the cheese. Apparently, there’s a different version for every restaurant and family unit in the South! I made several versions and then set out to create a flavor I liked most. So, at the bottom of this blog post is my favorite. Enjoy! Take it and make your own version.
-

- Churchill Downs. Finally.
-

- One out of the bucket list!
-

- Surreal
-

- Bobbie hikes and tours with us in his special carrier.
Menu for May 9 – 14

Upcoming Classes
Click to see a calendar of upcoming classes. In addition to the on-site classes that are on the calendar, I am working on developing a few online versions that can be accesses from anywhere. Stay tuned for that!
Pimento Cheese

Pimento Cheese
A yummy Southern cheese that is great on sammies, as a veggy dip, on crackers, and more. Easy to make and always a hit!
Servings: 12
Calories: 210kcal
Equipment
- 1 Stand Mixer
Ingredients
- 4 oz extra sharp cheddar cheese shredded small
- 8 oz cream cheese softened
- 1/2 c mayonnaise ideally Duke's is the brand used
- 1 clove garlic finely minced
- 2 T onion finely minced
- 4 oz jarred pimento drained and chopped
- 1/2 t salt
- 1/4 t black pepper
- 1/2 jalapeno optional, deseeded & finely minced
- 8 green olives optional, finely chopped
- 1/4 t cayenne powder optional
Instructions
- Place everything in stand mixer and beat at medium until blended.Makes about two cups.
Notes
I like to make this in two styles. To do that, I make a full batch with just the first eight ingredients. Then, remove half. This is your mild version. I then add half of the remining ingredients to the remaining cheese in the mixer bowl, blend and you have a version that bites a bit and with the saltier, umami flavor that olives bring, which I prefer.
Remember to use only half:
4 olives, 1/4 jalapeno, 1/8 t cayenne
If you decide to add extra olives than noted, keep in mind that they will bring extra saltiness to the cheese.
I would love it if you let me know if you change it and how. The variations are truly endless. Please share your adaptations in the comments.
Herbs or Erbs?
How is it pronounced?
In the USA we skip the “H” and say Erbs. In the UK it is pronounced herbs with the h-sound. How is it pronounced where you are?
Herbs are Vital for Cooking
What would dining be like if we didn’t have herbs?  Before the first humans decided to throw some rosemary or sage on their venison, I am sure it was mighty bland. The addition of herbs can be a powerful tool in cooking that can really make or break a dish. So, how to use them?
Cooking with Herbs can make all the Difference in a Dish
Some truly delicious meals are made when a combination of herbs are added at different times in the same dish. For instance,

New Mexican Posole
a truly divine posole (a New Mexican stew – Recipe at bottom of the post) may have dried coriander added to the pot at the beginning of it’s simmering time, then finished off with some glorious fresh cilantro after you’ve added a good-sized ladle to your bowl. (Did you know that cilantro and coriander are the same plant? In the US we refer to the plant as cilantro and its seeds as coriander. In Europe it is all called coriander.) Another option is to let someone else (like Art of Cookery) do all the hard work, then add your own pizzazz at home. Give us a call and we will reserve our yummy meals for you (see this week’s menu below), then you can pick it up and discover that we use a
lot of herbs to brighten it up a bit. Could there be anything better?
Rules of Thumb
A general rule of thumb is that dried herbs are added at the beginning of cooking to help them soften and release their flavors, and fresh herbs should be added at or near the end to bring out their fresh and delicate flavor in the finished dish.
Another thing to keep in mind is that dried herbs typically have a more intense flavor than fresh herbs. So keep this in mind when making substitutions, or when you feel like winging it and not following a recipe. A good ratio to use is 3:1 fresh to dried (1 TBSP fresh is 1 tsp dried). Say you’re using a recipe for a marinara that calls for a teaspoon dried basil, but you happen to have found a gorgeous bunch of fresh basil on your trip to the store. No problem! Just omit the basil when the directions say to add it at the beginning, then stir in 1 tablespoon of chopped fresh basil into the pasta right before serving.
Save a little of it to sprinkle over your plated pasta for a feast for the eyes as well as the palate.
Here at Art of Cookery we love to create artful and delicious food, and to show you how to do so as well, so be sure to scroll through more of our blog for lots of ideas and recipes that you can make your own. Also check out our classes and register for some to really up your food game. See you soon!


New Mexican Posole
This is a perfect taste of New Mexico
Servings: 4 quarts
Cost: $20
Equipment
- 1 Dutch Oven Or, an electric pressure cooker
- 1 wooden spoon to stir
- 1 mesh strainer
- 1 blender
- 1 rubber spatula to press the chilies through the strainer
Ingredients
- 2 tbsp oil divided
- 5 guajillo chilis stems removed and cut into three large pieces
- 3 roma tomatoes quartered
- 2.5 c boiling water
- 2 lb boneless pork roast cut into 1/2" chunks
- 1 1/2 lg onion chopped
- 8 garlic cloves minced
- 4 tbsp corn starch optional, only if you want it thick
- 2 bay leaves
- 1 1/2 tbsp Mexican oregano
- 1 tbsp chili powder
- 1 tsp ground coriander
- 4 15 oz cans white hominy or garbanzo beans drained and rinsed, a blend of half and half is nice.
- 12 c chicken broth
- 1 1/2 tsp salt Or to taste
- 1/2 tsp black pepper
- 3 tbsp lime juice
- 1 tbsp sugar optional
- 1/2 c chopped cilantro plus extra for garnish
- Garnish Suggestions: radish, avocado, red onion, lime wedges, tortilla chips, cherry tomatoes, basil
Instructions
- In a Dutch oven, sauté chilies in 1 tablespoon oil over medium heat until heated through, don't brown. Transfer chilies to a bowl; add boiling water. Soak them while you do the next step.
- In the Dutch oven, brown pork in remaining oil in batches, sauteing onion and garlic with the last batch of pork. Return all pork to pan and add broth. Bring to a boil. Reduce heat; cover and simmer until meat is tender, 30 minutes. Remove and fork apart if desired.
- Transfer chilies and their liquid and Roma tomatoes to a blender; cover and process until smooth. Press through a mesh strainer, reserving pulp and discarding skins/seeds. Add pulp to pork mixture. Stir in the pork, hominy (or garbanzo), bay leaves, chili powder, coriander, oregano and salt. Cover and simmer, 30 minutes.
- Stir in lime juice and cilantro.
- To serve, ladle into bowls. Optional: to garnish, spread a row of radishes around the curve of the bowl. Sprinkle red onions and cilantro on top. Place lime or lemon wedges and tortilla on plate next to the bowl.
Using an Electric Pressure Cooker
- Place oil in cooker and press saute. Add the peppers and sauté 2 minutes.
- Pour 2.5 c hot water over peppers and bring to a simmer. Press Cancel. Put on cover.
- Pressure cook at high for 2 minutes. Quick Release. (At this point you can skip the release and turn it off and just let it sit overnight and you can proceed the next day.) Pour contents into a blender, add tomatoes and puree. Pour into a mesh strainer set over a container. Push with rubber spatula until only skin/seeds remain in strainer.
- Meanwhile, in pressure cooker, add more oil and cook pork in batches over a high temp sauté. When the last batch is no longer pink, add the onions and garlic. Cook 2 minutes.
- Add cornstarch and stir to coat everything. Add all other ingredients, EXCEPT the lime juice and cilantro. Stir, cover, and pressure cook at high for 5 minutes. Natural release for 15 minutes.
- Open and stir in lime juice and cilantro. Garnish and serve.
Notes
NOTE: If the stew is too thick, add additional broth or water. If too thin, break out an additional can of hominy or white beans, puree in blender and add to the posole. Bring back to a simmer.
A good alternative to hominy are garbanzo beans.